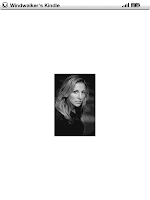
Thanks to Kindle Nation citizen C.A. for this recurring question about how to create an album of photos (or other graphic files) on your Kindle:
Hi, Mr. Windwalker. I bought your Complete User’s Guide To the Amazing Amazon Kindle 2 and followed the directions for putting pictures on my Kindle, but the “book” does not show up. Is there something I’m missing here? I made a directory called “pictures” that sits next to Audible, documents, etc., and yet it does not show up in the home menu. Can you help me?thanks,
C.A.
C.A., thanks for buying the guide, and for your question. This question comes up from time to time and it’s usually a simple matter of slowing down and making sure that you follow each step one at a time and in detail, which can be hard when you can’t wait to get those pictures onto your Kindle! So here are those steps again:
- Connect your Kindle to your computer via USB cable and navigate through “Finder” or “My Computer” to your Kindle. On a PC, the Kindle will probably be recognized as an “E” or “F” drive by your computer, depending on your hardware configuration. When you click on your Kindle to open it you will find that its memory is already configured with folders such as audible, documents, music and system.
- Add a new folder called “pictures” alongside the existing folders (unless you have already done this in a previous session. Important note: You must follow the exact instructions here and call the folder “pictures.” If you call it “photos,” for example, the Kindle will not recognize it.
- Within the new “pictures” folder, create a subfolder for any group of pictures you want to be able to browse through. Important note: this is an important step that people often skip. Without the named subfolder, you won’t be able to view your pictures.
- Create as many subfolders as you wish within the “pictures” folder, but be aware that graphic files, like audio files, can eat up a lot of your Kindle’s storage capacity, far more than most book files.
- Name the subfolders so that you will recognize them when they show up on your Home” screen’s list of titles.
- Copy the applicable pictures — they must be formatted as .jpg, .gif or .png files — into each folder from your desktop computer.
- Disconnect your Kindle from your desktop after you have finished copying pictures, and press the “Home” button to return your Kindle to your Home page.
- From “Home,” type “ALT+Z” to prompt your Kindle to recognize the new subfolder as a “Book.”
- If you created a subfolder called “Rover,” you should be able to find the title “Rover” on your Home scteen. Select the title — “Rover,” in this case — and use “Next Page” and “Previous Page” to browse through your Kindle photo album.
- Once you have opened the photo album, press the “Menu” button on the right edge of your Kindle 2 or Kindle DX for additional options. Several commands on the local menu at the bottom of the screen will allow you to adjust your view. You can also type “F” to set or leave “full screen mode,” or use the 5-way to move the cursor over a picture to bring up the “magnifying glass” icon and zoom in by pressing down on the 5-way.
I hope this helps!
©Kindle Nation Daily 2010


